The first successful British airborne operation took place the night of February 27/28, 1942. This was Operation Biting, a raid against the German radar installation at Bruneval, on the French coast.
To observe the 80th anniversary of the operation, I read The Bruneval Raid: Stealing Hitler’s Radar by George Millar. Published in 1974, this was the first book dedicated to Operation Biting; earlier books had included information on the raid, but not in the same level of detail. Millar’s book is considered one of the standards that belongs on the shelf of any Airborne enthusiast.
The British developed radio detection finding, later known as radar, before the war. By the summer of 1940, radar made a significant contribution to the Battle of Britain. The Royal Air Force then took the war to the enemy by conducting a bombing campaign that became increasingly bold and effective. By late 1941, however, the RAF were losing bombers in alarming numbers. The British believed they were the only ones who had developed radar technology, but had to face the distinct possibility the enemy were using it as well.
Using both aerial photo-reconnaissance and intelligence gathered by the French Resistance, the British learned that the Germans not only had radar, they used two radar systems which complemented each other. Freya, the earlier system, could detect aircraft at a distance. Würzburg was a newer technology; it had a shorter range but could determine the elevation of the aircraft. British scientists believed they could develop jamming systems, but needed to obtain specific details about the enemy’s equipment to do so.
Further investigation confirmed the use of both Freya and Würzburg at an installation at Bruneval, near Le Havre. Bruneval was well-garrisoned by the Germans; however, the Würzburg apparatus was near both open ground for a dropping zone as well as a small beach for evacuation by sea. Specific intelligence on the site’s defensive works was provided by the local Resistance. The location appeared to be ideal for a parachute operation.
This aerial reconnaissance photograph was taken in December, 1941, and identified the Würzburg radar at Bruneval. It was believed the large house was used by the German radar operators. Photograph from the Imperial War Museum collection (D 12870).
While Britain’s Airborne Forces are typically remembered for their divisional operations in support of major offensives, they began very differently. The first parachute units evolved from the Commandos, and like them, were originally envisioned as raiding forces to cause disruption and dismay to the enemy while bolstering morale at home. The first airborne raid was small and unsuccessful; in 1941, a parachute drop was made into mainland Italy to destroy the Tragino Aqueduct in hopes of halting production at a major industrial center. While the parachutists damaged the aqueduct as intended, repairs were made quickly, and all the paratroopers were captured.
Bruneval provided the opportunity for the Airborne Forces to prove their worth. C Company, 2nd Parachute Battalion, was chosen to conduct the raid; the unit was known as “Jock Company” for its large number of Scotsman. C Company was commanded by Major John Frost, who went on to become a legendary figure in the British Airborne.
C Company was to fly to France in converted Whitley bombers, accompanied by Royal Engineers and an RAF radar technician. Different rifle sections were assigned specific tasks, including securing the radar site and the large house nearby. The Würzburg apparatus was to be dismantled and the major components taken back to England. Simultaneously, the beach needed to be secured, while other sections formed a defensive screen between the German billets and the rest of Jock Company. Once all objectives had been secured, the paratroopers were to signal the Royal Navy, who would send landing craft to withdraw the raiders.
The operation was delayed several nights because of weather; conditions were finally right on the 27th. C Company flew from Thruxton airfield in twelve RAF’s Whitleys. Most of the planes dropped their 10-man sticks successfully, although a few sections were slightly mis-dropped and arrived late to the rendezvous.
Overall, however, the operation was a complete success. The few enemy troops near the radar device were quickly overwhelmed, and it took time for the main garrison to react. Flight Sergeant Cox, the RAF radar expert, directed the engineers on how to dismantle the Würzburg device and which parts were most valuable. With their precious cargo loaded into specially-designed folding trolleys, the raiders made their way to the beach and were successfully evacuated by landing craft. C Company even managed to capture a few German radar technicians. British casualties were surprisingly light.
Safely home – photo taken the morning of February 28, 1942. Members of C Company, 2nd Parachute Battalion, show a German helmet captured at Bruneval to Sqn. Ldr. Charles Pickard, who had commanded the Whitley squadron the night before. Photo from the IWM (H 17347).
Millar’s book is well-written and holds the reader’s attention. While I enjoyed the book, I was somewhat disappointed as the bulk of the narrative describes the development and use of radar by both the British and Germans. Fortunately, it was not written in an overly-technical manner, which I appreciated as someone who is not technically-minded. However, my purpose in reading the book was to learn more about the airborne operation: not just the actual raid, but the planning and training leading up to it. There is some excellent information and a fascinating narrative, but I wanted more.
That said, the footnotes were helpful, and the author’s sources were absolutely impeccable. Millar either interviewed or corresponded with several of the key figures, including Maj.-Gen. John Frost, radar expert R. V. Jones, and Gilbert Renault, one of the key agents of the French Resistance.
There are newer books on the subject which I intend to read in hopes of finding the detail I am looking for.
Sources
Millar, George The Bruneval Raid: Stealing Hitler’s Radar Cassell & Co, 1974
Britain’s highest award for bravery and devotion to duty is the Victoria Cross (V.C.); five such awards were given for the Battle of Arnhem. All of them are extraordinary stories, but the one I find most compelling and inspiring is that of Lieutenant Jack Grayburn. His Victoria Cross was the only one awarded for actions at Arnhem Bridge1; Grayburn was in the thick of the fighting the entire time, and in some ways, his deeds represent the entire 2nd Parachute Battalion.
John Hollington Grayburn, known to everyone as “Jack”, was born on January 30th, 1918, the son of Lionel and Gertrude Grayburn. Like many of his contemporaries, he was born in British India, but raised and educated in England. His father had been a soldier who fought in the Boer War before joining the banking industry.
Young Jack Grayburn was not the most academically inclined student; however, he was very athletic, and excelled at both boxing and rugby. Upon completing school, the family’s plan was for Jack to move to Hong Kong and work with his uncle at a major banking company; these plans were cancelled with war on the horizon. Grayburn joined the Army Cadet Force, then after war was declared, he was commissioned into the Oxfordshire and Buckinghamshire Light Infantry.
Lt. John (“Jack”) Hollington Grayburn, V.C.
In 1942, he met Marcelle Chambers, and they soon married. By 1943, they had a son named John.
Although often described as quiet and unassuming, Lieutenant Grayburn craved action; he became frustrated and bored serving on the Home Front, and volunteered for the Airborne Forces. In 1943, his wish was granted, and he was seconded to The Parachute Regiment. During parachute training, Lt. Grayburn was noted as an excellent leader. Upon earning his jump wings, Grayburn was assigned to 7th Parachute Battalion, then transferred to 2nd Parachute Battalion. He joined A Company, which was commanded by Major Allison “Digby” Tatham Warter2; Grayburn was given command of Number 2 Platoon.
Operation Market Garden was launched on September 17, 1944, and 1st Airborne Division dropped near the Dutch town of Arnhem. 2nd Parachute Battalion, under the command of Lieutenant-Colonel John Frost, was given the task of capturing Arnhem’s large road bridge over the Lower Rhine. The rest of the division was to take secondary objectives and form a defensive perimeter around the town. British 2nd Army was expected to link up with 1st Airborne in two to four days.
Maj. “Digby” Tatham Warter; photograph taken after the Battle of Arnhem. Tatham Warter was Lt. Grayburn’s company commander, and wrote Grayburn’s nomination report for the Victoria Cross. Photograph from the collection of the Imperial War Museum (H 40925).
The operation started off well; the weather was good, and the transport planes made their drops on time. 2nd Battalion consolidated at its rendezvous point, then began the march towards Arnhem Bridge, about eight miles away. A Company led the advance, with each platoon alternately taking the lead.
The Germans reacted quickly to the operation and set up blocking lines along the main routes into Arnhem. For the most part, 2nd Battalion was able to avoid enemy contact, but 1st and 3rd Battalions were not so lucky. However, Grayburn’s platoon was called on to assault and clear an enemy position during the advance.
A Company entered the town around 7:30, with Grayburn’s platoon in the lead; it was not quite dark. Lt.-Col. Frost wanted to get to the bridge as quickly and quietly as possible. Whenever Germans were spotted, the men were ordered to avoid detection and refrain from firing; they stayed off the roads and slipped through houses and back gardens. Lt. Grayburn and his No. 2 Platoon were the first to reach the bridge, followed by the rest of A Company; it was about 8:00. Numbers 1 and 3 Platoons stealthily occupied houses on either side of the bridge ramp, while Grayburn’s platoon remained on the embankment. A few enemy trucks were allowed to pass unharmed while the Company prepared their defensive positions. The local Dutch were advised to either evacuate the area or hide in their cellars.
While the enemy had reacted quickly to the landings and established blocking lines across the routes into the city, they had failed to reinforce the small garrison at the bridge; there were only about 20 guards. The British spotted a pillbox on the bridge, but it appeared unoccupied. One rifle section from No. 3 Platoon was ordered to attempt to cross the bridge, but was quickly repulsed.
Maj. Tatham Warter met with Lt. Grayburn to plan a more serious attempt. Night had fallen, so the men blackened their faces; they also wrapped their boots with strips torn from curtains to muffle the sound of their hobnails. No. 2 Platoon moved cautiously up the embankment and split into two columns; with no other cover, they stuck close to the girders as they advanced. However, the platoon was spotted and came under heavy fire from a machine gun emplaced in the pillbox; some sources indicate an armored car at the far end of the bridge and possibly a light flak gun also opened fire. Grayburn was hit in the shoulder, and eight of his men were wounded. With the rest of A Company giving covering fire, the platoon tried to push forward despite the casualties, but Maj. Tatham Warter ordered them to withdraw; Grayburn was the last man to leave the bridge.
Later that night, a team of Royal Engineers engaged the pillbox with a flamethrower and a PIAT3 anti-tank weapon. A wooden hut behind the pillbox contained fuel and ammunition, which exploded and caused the bridge’s paint to catch fire. The intense heat drove away the German defenders, but also prevented any further British attempts to cross.
During the night, A Company was reinforced by B Company and a number of supporting troops, including engineers and artillery. B Company had searched for boats so the bridge could be attacked from the south, but none were found. C Company never made it to the bridge, although a handful of soldiers from 3rd Parachute Battalion did. 1st Parachute Brigade Headquarters arrived, but without Brigadier Lathbury, who had been wounded on the march. The Brigade Major, Tony Hibbert, asked Lt.-Col. Frost to take overall command in the Brigadier’s absence. All told, about 740 officers and men held a defensive perimeter in the buildings on either side of the northern bridge ramp.
The next morning, September 18, saw a spectacular action. The reconnaissance element of the 9th SS Panzer Division had been observing the American landings at Nijmegen, ten miles to the south. While this German unit knew about British activity near Arnhem, word had not reached them that the northern end of the bridge had been captured. The Germans drove across the bridge in their armored cars and half-tracked troop transports, oblivious to any danger. Frost ordered that the first few vehicles should be allowed to pass so as not to alert the rest of the column. The remaining German vehicles were obliterated by PIATs and anti-tank artillery, with paratroopers pouring small arms fire from the tall houses into the open-topped troop carriers.
Arnhem Bridge. This aerial reconnaissance photograph, taken on September 18, 1944, shows 1st Airborne Division’s primary objective, the road bridge over the Rhine. A & B Companies of 2nd Parachute Battalion held the north end for nearly four days. Burnt-out German vehicles from that morning’s ambush can be seen just past the river. Photo from the Imperial War Museum (MH 2061)
For the rest of the 18th and most of the 19th, the Germans mortared 2nd Battalion’s positions and followed up with numerous infantry attacks. 2nd Battalion repulsed wave after wave and inflicted heavy losses on the enemy. Lt. Grayburn’s platoon held one of the most important houses and withstood the severest attacks. However, further reinforcements and resupply never reached the Battalion; rations, ammunition and medical supplies were becoming scarce.
On the afternoon of September 19th, the Germans changed their tactics. They brought up tanks and self-propelled guns, and started firing high explosive and phosphorus rounds into the houses, attempting to either blow them down or burn them. With British casualties mounting, especially amongst officers and NCO’s, Lt.-Col. Frost gave command of 2nd Battalion to Maj. Tatham Warter, who in turn delegated Lt. Grayburn with leading A Company. Both Tatham Warter and Grayburn had received numerous wounds by this point, but both continued to lead their men.
By the morning of the 20th, things had turned truly desperate. 2nd Army’s relief column still had not arrived; neither had help come from the rest of 1st Airborne. The few remaining buildings had their cellars crammed with wounded men, and those still able to fight had moved into slit trenches in the gardens. With so many casualties, formal unit structures had broken down and the paratroopers formed ad hoc units out of those who remained; signalers and artillerymen fought as infantry. The defensive perimeter kept shrinking; with little ammunition, the British resorted to bayonet charges to retake key positions, with several of these attacks led by Lt. Grayburn.
Unknown to 2nd Battalion, the leading elements of 2nd Army reached Nijmegen on the 20th, just ten miles away. While the Germans had been ordered by high command not to destroy Arnhem Bridge, they were finally authorized to demolish the ramp arch closest to the river; this would prevent British tanks from crossing, but could be more easily repaired should the need arise. The Germans succeeded in driving away the paratroopers who had been defending the ramp arch, and were able to place their demolition charges. Lt. Grayburn realized the danger and led an attack to retake the position; the accompanying engineers succeeded in de-fusing the charges. They were joined by other soldiers who sought shelter under the bridge after their previous positions were overrun by the enemy. However, German tanks and snipers began taking a toll on those men under the bridge. Lt. Grayburn, as the last remaining officer, directed the others to withdraw; while doing so, he was cut down by a tank’s machine gun and died from his wounds that night. He was 26 years old.
Private Steve Morgan from 2nd Battalion’s medium machine gun platoon was with Grayburn at the end.
Late Wednesday the afternoon we were ordered out of this building, as there were so few of us and ordered to go back under the bridge. This we did one at a time dashing for cover in case there were hidden snipers but the road was quiet. There was quite a bit of cover for us due to the building materials stored there and it was here that I saw Lieutenant Grayburn for the first time…
He was already wounded in several places, I remember seeing a bandage round his head, his right arm was in a sling as he had a bullet or shrapnel wound in his shoulder and he was firing his pistol with his left hand. One of his trouser legs was ripped, I could see his leg was bandaged, I also noticed that the back of his jacket had holes and scorch marks where he had been caught in a mortar attack…
He patted me on the back and said something like “It’s time to go”. We ran out from under the bridge in a zig-zag formation firing our weapons and it was at this point that I finally ran out of ammunition…
I reached cover but before Lieutenant Grayburn could join me the tank in front fired and he fell. I looked out and saw him lying on the road, I realised he was still alive and called to him. I also remember somebody, who sounded like an Officer, shout from a nearby building something like “How bad is it?” He replied “Leave me”, he knew he was dying, the Officer replied “Goodbye dear boy”. I also remember somebody who also sounded like an Officer call out “Good Luck”. I decided to try and pull him under cover and crawled out on my front, it was quite odd because the Germans did not fire at me. He was laying in the road half on his back and half on his side, I lay down beside him and curled my hand around his wrist and he looked at me. He kept insisting that I leave him saying “Leave me, save yourself and get back to the Battalion.” I realized there was nothing I could do for him as I had given all my bandages and morphine to members of the 16th Parachute Field Ambulance and unfortunately he was too heavy for me to move on my own and I had no choice but to get back under cover… He was a very brave man and somebody who I admired very much.
Private Steve Morgan With a Machine Gun to Arnhem
Lt.-Col. Frost was wounded soon after by a mortar round. A ceasefire was arranged at nightfall, and the British were allowed to evacuate their wounded and transfer them to the care of the German medical staff. As the Germans had been systematically burning the buildings down, it was better for the wounded to be taken prisoner than to be trapped in the cellars and burned to death. At the end of the truce, those who were still able to fight were ordered to hold on as long as possible, then try to break out and reach the rest of the Division. The fighting at the bridge ended around 5:00 the morning of the 21st.
This aerial photograph was taken during the same sortie on September 18 as the photograph above. It shows the northern bridge ramp and the surrounding buildings; the destroyed German vehicles are more clearly seen than in the above photo. By September 21, most of these buildings had either been flattened or turned into burnt-out shells. The bridge arch at the extreme right of the photo is where Lt. Grayburn was killed. Photo from the Imperial War Museum (MH 2062).
Maj. Tatham Warter was amongst the wounded prisoners. However, he managed to escape, and went into hiding with help from the Dutch Underground. About a month after the battle, Tatham Warter organized the withdrawal of over 100 escapees from the Division, and coordinated their evacuation across the Rhine. Upon his return to England, Tatham Warter, as acting commander of 2nd Parachute Battalion, wrote a report describing the Battalion’s part in the battle. He wrote a second report describing Lt. Grayburn’s actions and recommending him for both a posthumous Victoria Cross and promotion to Captain. Both were granted; Grayburn’s award citation was taken almost verbatim from Tatham Warter’s nomination report.
Grayburn’s Victoria Cross citation was published in the London Gazette in January, 1945. The citation concludes:
From the evening of September 17th until the night of September 20th, 1944, a period of over three days, Lieutenant Grayburn led his men with supreme gallantry and determination. Although in pain and weakened by his wounds, short of food and without sleep, his courage never flagged. There is no doubt that, had it not been for this officer’s inspiring leadership and personal bravery, the Arnhem bridge could never have been held for this time.
Victoria Cross Citation for Captain John Hollington Grayburn, January, 1945
Grayburn’s body was buried on the bridge ramp’s embankment. After the war, his remains were identified and re-interred at the Arnhem Oosterbeek War Cemetery. The carvings on Grayburn’s headstone portray the Victoria Cross and the cap badge of his parent regiment, the Oxfordshire & Buckinghamshire Light Infantry.
The grave of John Hollington Grayburn, V.C., at the Arnhem Oosterbeek War Cemetery; photo taken in 2003. The original headstone indicated Grayburn’s posthumous promotion to Captain as well as his Victoria Cross. In 2004, the marker was replaced with one showing the rank of Lieutenant. Author’s photograph.
In 1987, Lt. Grayburn’s son, John, presented his father’s medals to the Airborne Forces Museum at Browning Barracks, Aldershot. John Frost, who had retired from the Army with the rank of Major-General, presided over the ceremony. He wrote about the occasion for the newsletter of the Para 2 Club.
The son was so like the father that I was strongly reminded of the young officer who was so unassuming, gentle and perhaps ordinary that he was not a person one would expect to be so outstanding in the battle. However perhaps it is always men such as he who have the inner strength to do what we would all wish to be able to do. Despite wounds with the resulting shock and pain, the deprivation of every solace, the continuous enemy bombardment and the threat of being engulfed in flame, he fought on from his battle position until relieved by death. There were of course many others who did likewise, but no one so exemplified the spirit of the Battalion so well as Jack.
Maj.-Gen. John Frost Para 2 Club Newsletter Reprinted in Without Tradition, Robert Peatling, editor
Arnhem V.C.s. The Victoria Crosses and campaign medals awarded to Captain Lionel Quirepel (upper left) and Lieutenant “Jack” Grayburn (lower right). Photograph from the Airborne Assault Museum.
Personal Reflection
My living history organization portrays 2nd Parachute Battalion, and Lt. Jack Grayburn has been one of my personal heroes for many years. When I visited the Arnhem Oosterbeek War Cemetery, I paid my respects at the graves of the three Victoria Cross recipients buried there. Earlier in the trip, I had obtained a pair of small memorial crosses through the Royal British Legion; I saved one specifically for Lt. Grayburn’s grave. A few years later, on a trip to England, I visited the Airborne Forces Museum at Browning Barracks, Aldershot, where I viewed Lt. Grayburn’s medals; unfortunately, I was unable to take pictures. This was shortly before the barracks were torn down; the museum’s collection was transferred to the Airborne Assault Museum at Duxford, which I have not yet been able to visit.
When I was first working on this article, I naturally wanted to focus on Lt. Grayburn’s story; I had no intention of writing a comprehensive description of the battle for Arnhem Bridge. However, the more research I performed, the more I realized just how closely the two are linked; Jack Grayburn’s story is the story of the bridge battle. As noted in his Victoria Cross citation, the defenders at the bridge may not have held as long as they did, had it not been for Grayburn’s bravery and leadership. Grayburn was singled out for his extraordinary courage, but I believe his Victoria Cross represents all of 2nd Parachute Battalion and the others who fought at the bridge.
While Lt. Grayburn’s story has fascinated and inspired me for a long time, it was Private Steve Morgan’s description of Grayburn’s final moments that finally inspired me to write this article. Pte. Morgan’s memoirs were published earlier this year, a few months after his passing. Another helpful source was A Tour of the Arnhem Battlefields by Colonel John Waddy, who fought at Arnhem with 156th Parachute Battalion. I was sad to learn that Col. Waddy died, at the age of 100, while I was writing this article. There are very few Arnhem veterans remaining.
Update
I took the above photograph of Grayburn’s headstone in 2003. I recently learned that the headstone was replaced a year later, and now shows the rank of Lieutenant instead of Captain. According to the Commonwealth War Graves Commission, their initial information was that Grayburn had been given a posthumous promotion. The Ministry of Defense, however, had no record confirming the promotion; a new gravestone was erected accordingly.
My thanks to Richard Grayburn, the Lieutenant’s grandson, as well as the members of the Bridges to Arnhem Facebook group for the information and fascinating conversation.
Notes
1The other four recipients of the Victoria Cross for their actions at Arnhem were: Flight Lieutenant David Lord, V.C., Royal Air Force (posthumous); Major Robert Cain, V.C., 2nd Battalion, The South Staffordshire Regiment; Captain Lionel Quirepel, V.C., 10th Parachute Battalion (posthumous); Lance Sergeant John Baskeyfield, V.C., 2nd Battalion, The South Staffordshire Regiment (posthumous).
2Most historians insist on hyphenating Maj. Tatham Warter’s name; however, he himself never used a hyphen.
3Projector, Infantry, Anti-Tank, a spigot-mortar that launched a shaped charge capable of incapacitating most tanks of the period.
Sources
After the Battle Magazine Special Issue: “The Battle of Arnhem” Ramsey, Winston G., editor Battle of Britain Prints International, Ltd., 1986
By Air to Battle: The Official Account of the British First and Sixth Airborne Divisions His Majesty’s Stationery Office, 1945
Beevor, Antony Arnhem: The Battle for the Bridges, 1944 Viking / Penguin-Random House, 2018
Middlebrook, Martin Arnhem 1944: The Airborne Battle, 17-26 September Viking / Westview Press, 1994
Morgan, Steve With a Machine Gun to Arnhem Cherry, Niall, Editor Brendon Publishing, 2020
Peatling, Robert Without Tradition: 2 Para 1941 – 1945 Pen & Sword Books Ltd., 1994
Steer, Frank Arnhem: The Bridge (From the Battleground Europe Series) Leo Cooper / Pen & Sword Books, Ltd., 2003
Waddy, John A Tour of the Arnhem Battlefields Pen & Sword Books, Ltd., 1999
The epic yet disastrous Battle of Arnhem began on September 17, 1944. One year later (75 years ago today as I write this), a simple Memorial was unveiled and dedicated to the 1st Airborne Division. The monument consisted of a broken portion of a column from what was once the town’s Palace of Justice, inscribed simply with the date the battle began. The monument was placed near Arnhem’s road bridge over the Lower Rhine, 1st Airborne’s primary objective and scene of some of the heaviest fighting.
Dedication ceremony of the 1st Airborne Memorial on September 17, 1945. Members of the Division are shown here presenting arms. Photograph from the Imperial War Museum (BU 10526)
A modern view of the Airborne Plein, the 1st Airborne Memorial, and the repaired St. Walburgis Church from almost the same angle as the 1945 photograph above. Photo by the author’s spouse.
The dedication ceremony was led by the Governor of the Province of Gelderland, of which Arnhem is the capital, and was attended by survivors of the battle. 200 soldiers from 1st Airborne were present; they were in Arnhem to make the film, Theirs is the Glory. The dedication was also attended by members of the 1st Polish Parachute Brigade and the Dutch Underground. Perhaps the most prominent speaker was Lt.-Col. John Frost, who commanded the force that had captured the north end of the bridge and held it for four days against tremendous odds.
In this photo, a representative of the Dutch Underground has just laid a wreath during the dedication ceremony. Photo from the Imperial War Museum (BU 10525)
At the time of the ceremony, the war in Europe had only been over for four months, and Arnhem’s town center was still in ruins. While the road bridge survived the battle, it was later destroyed; the collapsed remains lay in the river. Several nearby buildings had been flattened by German tanks and artillery. St. Walburgis Church was missing the tops of its twin spires, damage caused when a German Focke-Wulf 190 fighter had crashed into them while strafing British positions.
Today, the town center looks little like it did before the war; the charming, traditional Dutch structures have been replaced by ugly, modern office buildings. A traffic circle now surrounds the Memorial, allowing cars to freely travel across the rebuilt bridge, named in Frost’s memory. Within the traffic circle is the Airborne Plein, accessible to pedestrians and bicyclists via tunnels under the road. Airborne Plein is normally translated as “Airborne Square”, although with the round shape, “Airborne Plaza” may be a closer translation. The Memorial is in the exact center; additional markers were added in 1994 for the fiftieth anniversary of the battle. While there are now monuments and markers throughout Arnhem and the surrounding area, the 1st Airborne Memorial at the Airborne Plein was the first to be erected, and remains one of the primary locations for the annual commemoration events.
Another modern view of the Airborne Plein. The column is inscribed with the date the Battle of Arnhem began, 17 September 1944. Photo by the author’s spouse.
I have only been able to visit Arnhem once, and my time was limited. But I made sure to visit the Airborne Plein and the Memorial to pay my respects; I then made my way to John Frost Bridge.
Lt.-Col. John D. Frost at the podium for the dedication ceremony. IWM (BU 10524)
Sources
Holt, Tonie and Valmai Major & Mrs. Holt’s Battlefield Guide: Operation Market-Garden Leo Cooper / Pen & Sword Books, Ltd., 2001
Ramsey, Winston G. (Editor) “Arnhem” After the Battle Magazine Battle of Britain Prints International Ltd., 1986
Steer, Frank Battleground Europe: Market Garden Arnhem: The Bridge Leo Cooper / Pen & Sword Books, Ltd., 2003
Truesdale, David, and Smith, Allan Esler Theirs is the Glory: Arnhem, Hurst and Conflict on Film Helion & Company, Ltd., 2016
In June, 1940, Prime Minister Winston Churchill sent a memorandum to the War Office calling for the creation of an airborne unit. Churchill had been impressed by Germany’s use of parachute and glider troops during their invasion of France and the Low Countries, and felt Britain should have a similar capability.
It took time for the Airborne Forces to become fully developed. No. 2 Commando, consisting of 500 men, was given parachute training in the summer of 1940. Airborne Forces were then expanded, and in September, 1941, 1st Parachute Brigade was created. No. 2 Commando was renamed 1st Parachute Battalion, and 2nd and 3rd Parachute Battalions were established. The new Battalions recruited soldiers from all across the British Army. In those early days, the only Airborne-specific insignia was the parachute brevet (or “jump wings”); the famous maroon beret had not yet been adopted, and the new paratroopers continued to wear the insignia and headdress of their previous units.
2nd Parachute Battalion’s first Commanding Officer, Lt. Col. Edwin Flavell, gave each of his officers a bright yellow lanyard to wear on the left shoulder, to distinguish them from officers of the other two battalions. The “other ranks” (enlisted personnel) decided they wanted to wear the yellow lanyard, as well. However, they had to make their own, which required a certain amount of improvisation and ingenuity.
The lanyards were made by cutting a length of rigging line, made of white silk or nylon, from a parachute after a training jump. This cord was braided or tied into a lanyard; those unskilled in making it themselves begged help from friends.
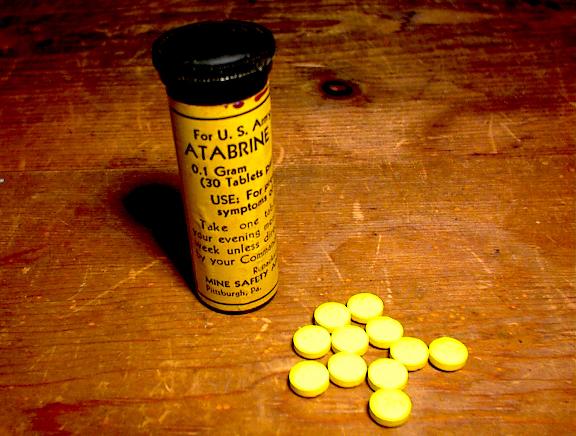
The most ingenious part of the process was dying the lanyard. Troops sent to the tropics were ordered to take Mepacrine, also known as Atabrine, a bright yellow medicine intended to fight malaria. Continued use of this drug was known to turn the skin and eyes yellow; therefore, it was seen by the troops as a logical dye. Mepacrine pills were acquired, then ground up and dissolved in water to turn the white lanyards a deep yellow or golden color.
US-issued Atabrine; the British called it Mepacrine. It was a common anti-malaria drug in the 1940’s, but continued use turned the eyes and skin a yellow color.
Intentionally damaging a parachute and misusing medical supplies were both serious offenses. The officers of 2nd Parachute Battalion would normally have punished anyone guilty of these military crimes. However, they turned a blind eye and even unofficially encouraged the behavior. The yellow lanyards became prized possessions; the men were immensely proud of their Battalion, symbolized by the yellow lanyard.
Eventually, 1st Parachute Battalion adopted a dark green lanyard, and 3rd Parachute Battalion adopted red. However, their creation did not seem to have the same creativity behind them.
By the time James Sims joined 2nd Parachute Battalion in 1943, it was a veteran unit, having recently returned to England after bitter fighting in North Africa and Sicily. Airborne Forces had expanded to two Divisions, the 1st and the 6th, and the maroon beret had been adopted for all Airborne Forces, including glider troops. The Parachute Regiment had been formed officially, with its own insignia and cap badge. However, in 1st Parachute Brigade, the colored lanyards were still in use to distinguish the different Battalions.
As described in Sims’ book Arnhem Spearhead, the yellow (or golden) lanyard was still made the same way as in the early days of the Battalion. Sims was given his when he first joined the Mortar Platoon of S Company.
They laughed at my discomfiture but suddenly one of them said, ‘Here, put this on.’ He handed me a beautiful gold lanyard, obviously made out of parachute nylon rigging line, the removal of which was a court martial offence. This gold lanyard was worn only by the 2nd Battalion and was produced as follows.
After a jump a para would cut off a rigging line and secrete it about his person. Back at camp he would persuade someone skilled in the art to plait it into a lanyard. He would then dissolve a mepacrine tablet in a saucer of water in which he would place the lanyard, leaving it overnight. In the morning he would have a beautiful gold lanyard. No one could recall the genius who first devised this unauthorized use of medical supplies, which was based on the idea that if these tablets could turn a man yellow they would do the same for nylon. Because of this practice the 2nd Battalion were known in the First Para Brigade as the Mepacrine Chasers. The 1st Battalion had dark green lanyards and the 3rd red. Everyone in our battalion had a ‘larny’ lanyard, as it was known, and it was very highly regarded.
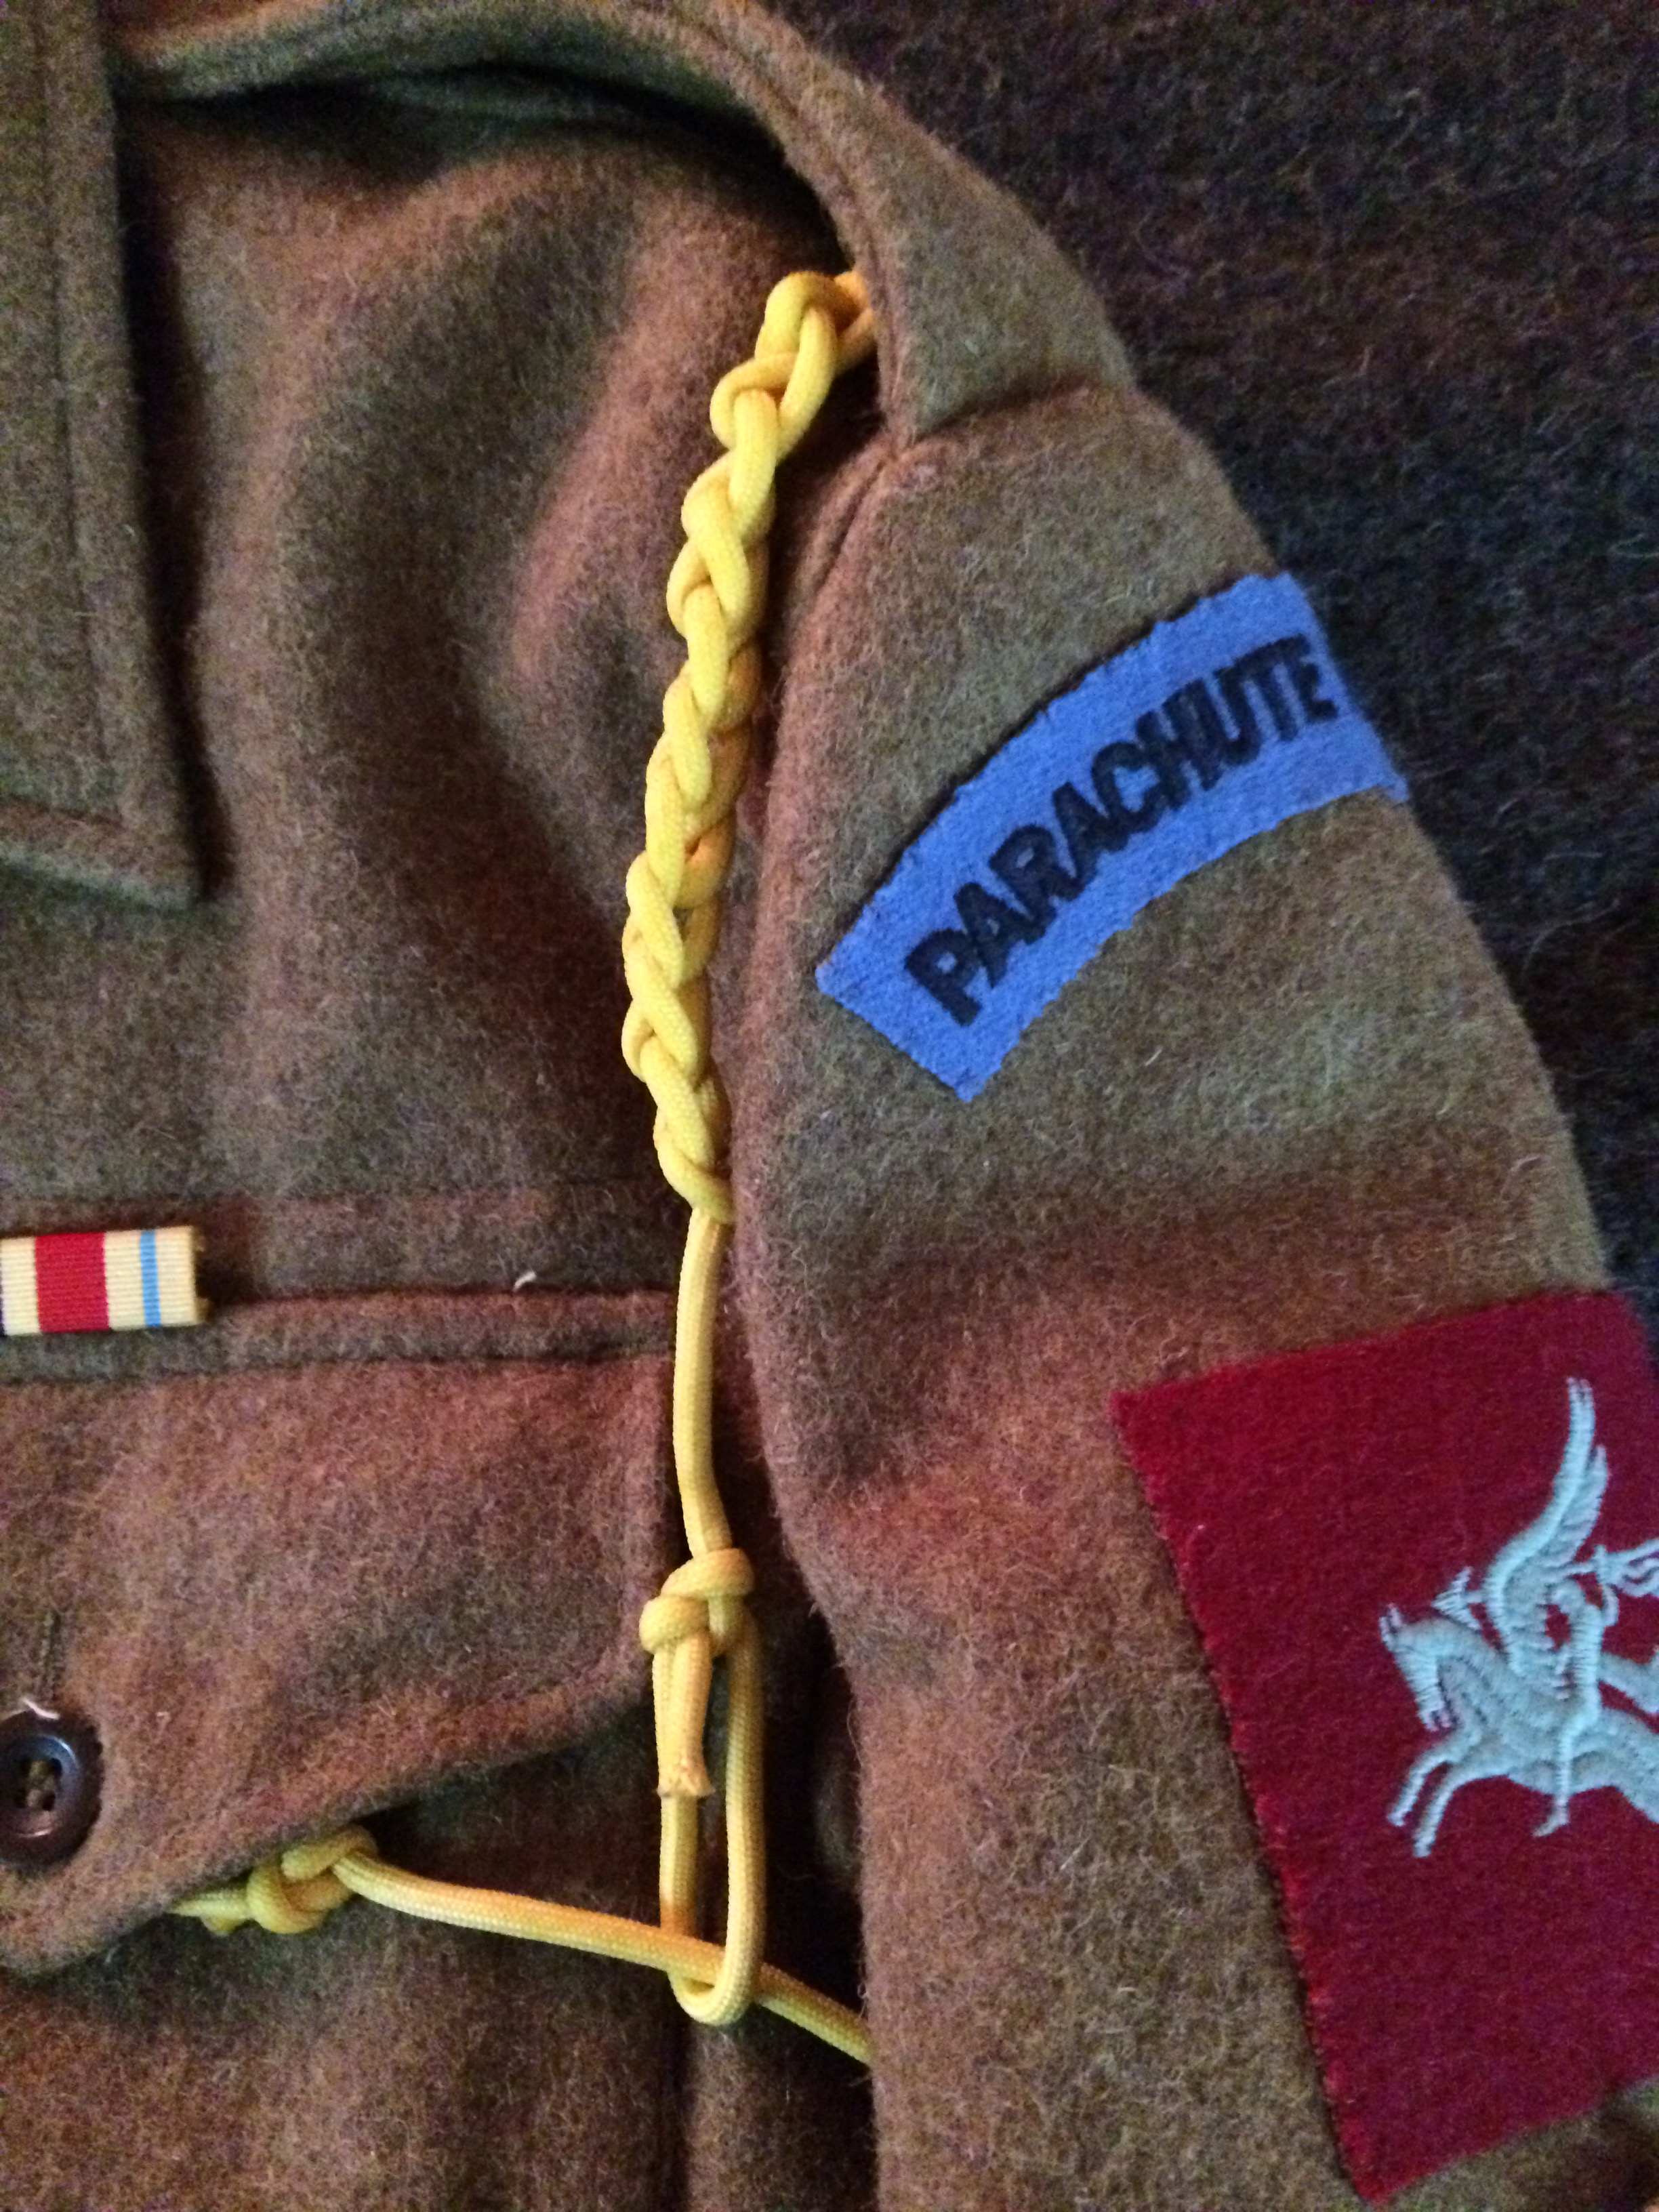
I belong to a living history organization which portrays B Company, 2nd Parachute Battalion, and it is humbling to read about the extraordinary men whose history we try to preserve. I gave a copy of Arnhem Spearhead to a close friend as a Christmas present. Being an avid sailor and generally good with knotting and braiding, he decided to make a number of lanyards for us. He used nylon parachute cord, and experimented with different formulas and concentrations of “RIT” dye. Previously, I had worn a machine-made yellow lanyard from a surplus store; replacing it with a hand-made lanyard given to me by my friend is much more meaningful, and much closer to what the original lanyards represented.
Hand-braided, hand-dyed yellow lanyard, made based on the description in James Sims’ Arnhem Spearhead.
Arnhem Spearhead is out of print, but copies are often available online. Lt. Col. Flavell’s issue of the yellow lanyard to the officers of 2nd Parachute Battalion was recalled by the Battalion’s first Adjutant, and later, most famous commander, John Frost, in the book Without Tradition: 2 Para 1941 – 1945, by Robert Peatling.
More information on Maj. Gen. John Frost and 2nd Parachute Battalion may be found in an earlier blog post, here.
One of my greatest heroes is Major-General John Frost. This should not be a surprise; I am fascinated by the history of the British Airborne Forces, and Frost was one its most important figures.
Several months ago, I was asked to write an article for my World War II living history club’s newsletter. I was specifically requested to write a biographical article. I decided immediately to write about Frost. With the permission of the editors of “The Front”, the newsletter of the California Historical Group, I am posting the article here.
Major-General John Frost, CB, DSO & Bar, MC (1912 – 1993)
John Dutton Frost was a British Army officer best known for his association with 2nd Battalion, the Parachute Regiment.
Frost was born in India, to British parents, on 31 December, 1912. He was educated in England. As his father was an Army officer, it was only natural that he attended the Royal Military College, Sandhurst. He graduated in 1932, and was commissioned into the Cameronians (Scottish Rifles). After promotion to Captain, Frost was sent abroad and worked with the Iraq Levies, whose primary function was guarding RAF airfields. Frost and his fellow officers formed a traditional hunt club, although they hunted jackals instead of foxes.
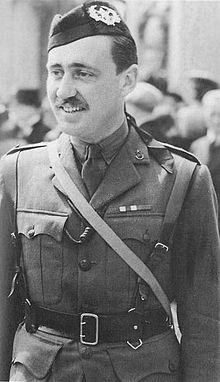
Frost in the uniform of the Cameronians (Scottish Rifles)
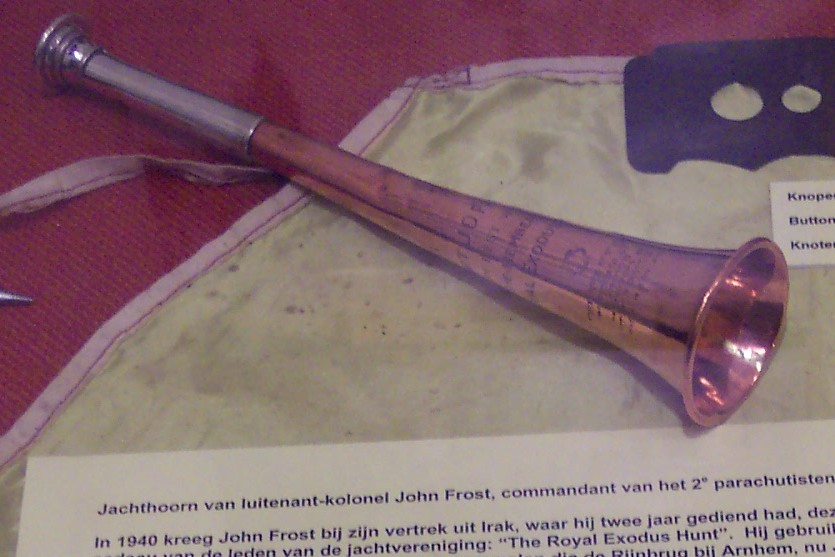
Originally, Frost enjoyed his time in Iraq. However, when war with Germany was declared in 1939, Frost became frustrated and felt the war would pass him by. He returned to Britain in 1941; the hunt club gave him an engraved hunting horn as a parting gift. Frost spent a short time with the Cameronians, but soon volunteered for the recently-formed Airborne Forces and was assigned to 2nd Parachute Battalion.
1st Parachute Battalion had been in existence for about a year, but 2nd and 3rd Battalions were just being formed. The three battalions comprised 1st Parachute Brigade, and were composed entirely of volunteers. Many of the officers were newly-commissioned; because of his experience, Frost was made 2nd Battalion’s Adjutant.
Shortly after Frost completed his parachute training, he was given command of 2nd Battalion’s C Company, known as “Jock Company” as it was almost entirely made of Scotsmen. In February, 1942, C Company conducted a raid against an enemy radar station at Bruneval, France, near Le Havre. This was Britain’s first major airborne operation. Frost and his men overwhelmed the garrison, while an RAF radar expert and several engineers dismantled the radar array. The Company was evacuated by the Royal Navy, and the radar components were taken back to Britain for study. The raid was considered a complete success and was widely publicized, although the exact reason was not released to the media. However, it justified the existence of Airborne Forces to the military establishment, and provided a boost to British morale when it was desperately needed.
In the autumn of 1942, Frost was given command of 2nd Parachute Battalion. 1st Parachute Brigade was attached to British 1st Army and sent to North Africa. After the Operation Torch landings in November, each of the three battalions was assigned a separate parachute operation to help the breakout from the beachhead. 1st and 3rd’s operations went well, but 2nd Battalion was not as lucky. They were ordered to drop on two airfields, Oudna and Depienne, near Tunis. Shortly after arrival, Frost received word via radio that 1st Army had cancelled their drive to Tunis; Frost was forced to lead his men on a fighting retreat across the desert to friendly lines. They held defensive positions during the day and moved at night; Frost would sound his hunting horn to keep the men from getting separated in the dark and the rough terrain. Casualties were heavy, but the Battalion survived. Many of the survivors credited Frost’s tenacity and leadership for their escape.
1st Parachute Brigade continued to fight as standard infantry. As British 8th Army pushed from Egypt and Libya, the enemy attempted to break through the less experienced 1st Army. 1st Parachute Brigade saw more action than any other unit in 1st Army, as they were rushed to plug whatever weaknesses were found in the line. Because of their maroon berets and their ferocious fighting ability, the British parachutists earned the nickname “The Red Devils”.
Once North Africa had been secured, the next move was the invasion of Sicily, in July 1943. After the initial landings, 1st Parachute Brigade was dropped as part of the breakout. Their objective was the Primosole Bridge over the Simeto River; unfortunately, the bridge’s importance was also recognized by the enemy, who reinforced the position. 1st Parachute Brigade captured the bridge, but their ammunition ran out and they were forced off the objective. They withdrew to the high ground south of the bridge; the leading elements of 8th Army were then able to recapture the bridge. 1st Parachute Brigade suffered numerous casualties, and were ordered to return to England to rest and refit.
In June, 1944, British 6th Airborne Division played a significant role in the invasion of Normandy; 1st Airborne remained in Britain as a reserve. Numerous operations were planned for the Division, but cancelled. In September, the Division took part in Operation Market Garden. 1st Airborne was to seize the vital road bridge over the Lower Rhine in Arnhem, Holland, near the German border. It was hoped this operation would outflank the heavily defended Siegfried Line and get the Allies across the Rhine and into the enemy homeland.
The dropping and landing zones were several miles away from the objective, and the enemy successfully engaged in blocking actions to delay the Airborne troops from reaching the bridge. Most of 2nd Battalion made it to the north end of Arnhem bridge, along with elements of 1st Parachute Brigade headquarters. As Brigadier Lathbury was wounded on the march, Frost took command of the entire force at the bridge. Heavy enemy fire from armored cars prevented the composite force from capturing the south end of the bridge.
The next day, a reconnaissance unit from the 9th SS Panzer Division, which had been observing American movements in Nijmegen, attempted to cross Arnhem bridge from the south but were unaware of the British defensive positions. British PIATs and anti-tank guns caused havoc. 2nd Parachute Battalion continued to hold their position, but soon ran out of ammunition and other supplies. The Germans brought in more and more reinforcements, both infantry and armor. By the end of the fourth day, the British could no longer fight. Most men were wounded, including Frost. Those who were healthy enough to fight had no ammunition with which to do so, and were ordered to try to connect with the rest of the Division. Frost and his men were taken prisoner and sent to a camp in Germany, where they remained until the end of the war.
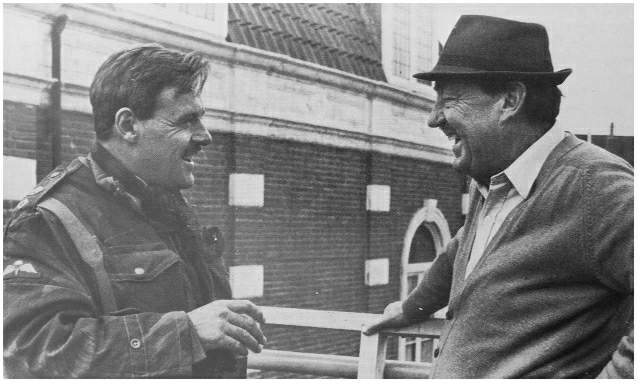
Anthony Hopkins and Maj.-Gen. Frost on the set of “A Bridge Too Far”
After the war, Frost remained in the Army until 1968; he retired at the rank of Major- General. Frost was interviewed by Cornelius Ryan for the book A Bridge Too Far, first published in 1974. Frost then served as a consultant for the film adaptation, released in 1977, in which he was portrayed by Anthony Hopkins (for my review of the film, click here). In 1978, the town of Arnhem named the road bridge over the Rhine the John Frost Bridge. Frost wrote an autobiography, A Drop Too Many, which was first published in 1980.
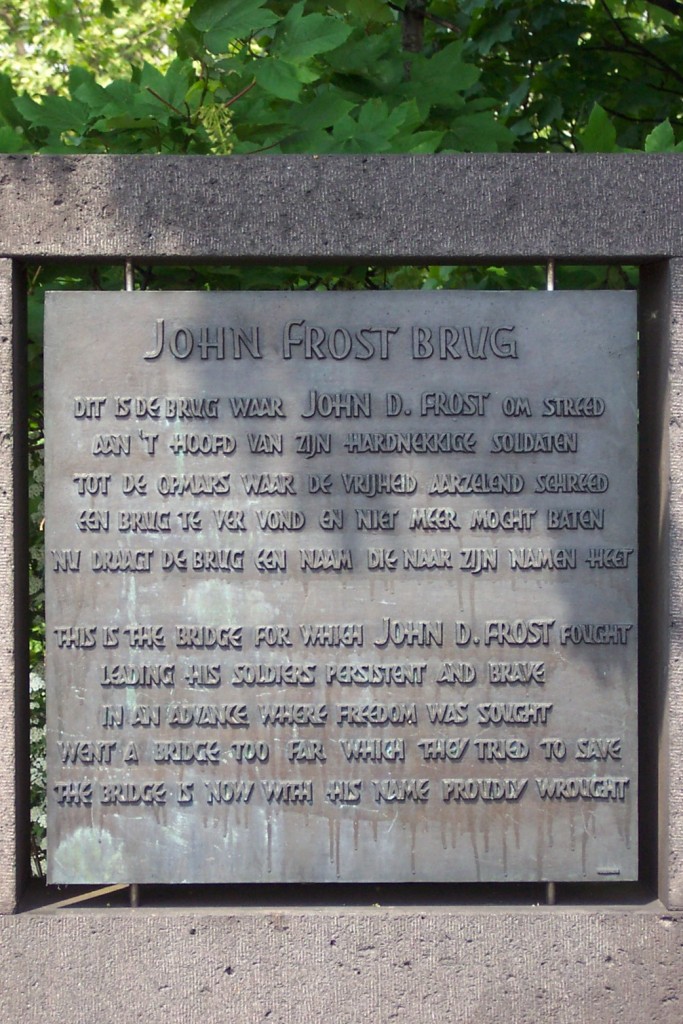
Plaque at the north end of the John Frost Bridge over the Lower Rhine, Arnhem, Netherlands. Photo by the author’s spouse.
John Frost died on 21 May, 1993, at the age of 80. His widow donated his famous hunting horn to the Airborne Museum, Hartenstein, in Oosterbeek, where it can still be seen today. For his leadership and personal bravery, he had been awarded the Military Cross and the Distinguished Service Order, with bar; he was also made a Companion of the Order of Bath.